
Over the past few months I have been demoing this all over Scotland (and from what I gather Ireland have liked this one too!)....
This is the finished snowflake.......

And this is how you make it....

You will need 9 large squares and 10 smaller squares (if you wanted to have a thinner snowflake then only do one of the layers). I have used this xcut die to give it a decorative edge, you could used a border punch if you preferred.

Take each square and score from the bottom corner to the middle of the opposite two edges. Use this picture as a reference guide.
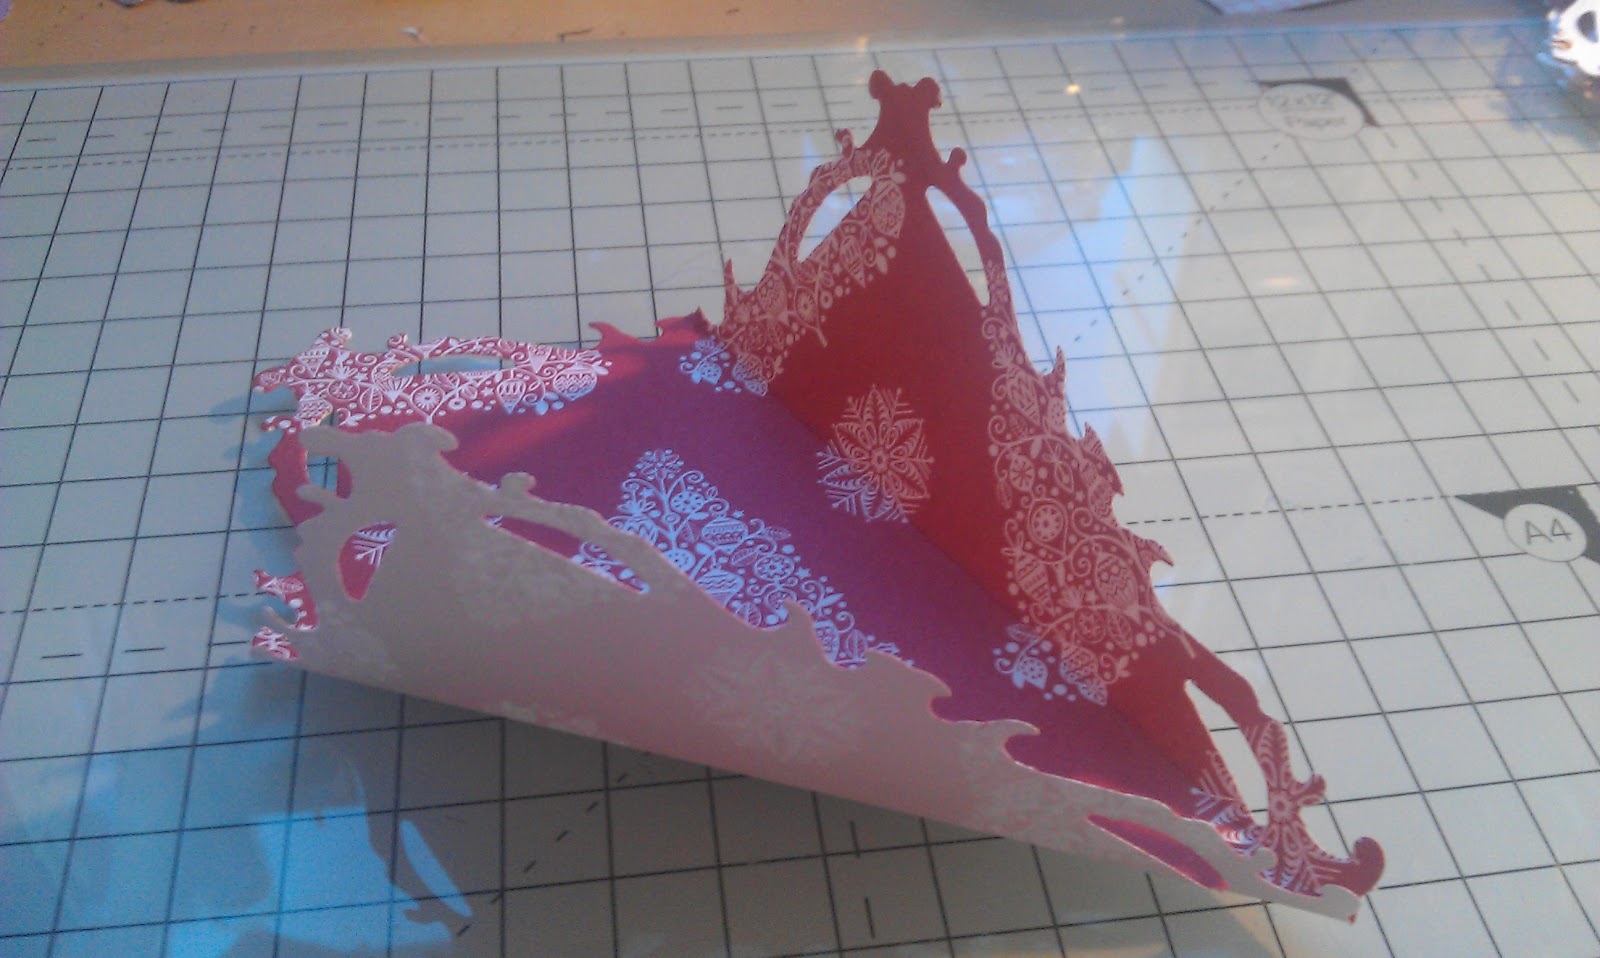
Crease these lines - make the pattern on the inside as is shown on the above photo.

When you have done this on all the squares, stick them together.
I use a pva glue and I hold them together with paperclips until they are dry.
If you are in a hurry, you can use double sided tape.

Continue until you have completed both snowflakes.

Remove the paperclips and fold over the edges so they lie flatter. Place the smaller snowflake over the top of the larger on and hold in place with a large brad.
You could also use silicone glue and a paper disk.
This one I made using vellum..... isn't it pretty.....


I hope you like this little tutorial.
I'd love to see your version of these, remember to stop by and leave me a link to your blog so that I can any you make.
Happy crafting,
Nikki x
WOW these are gorgeous! Well done :) xx
ReplyDeleteWow, so effective and such a good idea, will have to try this one.
ReplyDeleteWhat a gorgoeus snowflake thanks for the tutorial. Caroline xxx
ReplyDeletenice and I own those dies. :)
ReplyDeletewow they are fabulous and gorgeous and thank you for showing me how to make them xxxx
ReplyDeleteBeautiful - love the vellum one
ReplyDeleteKate
xx
So so pretty Caroline.
ReplyDeleteThe tutorial is great too, really clear and really easy to follow - perfect, thank you.
Claire
Oooh these are just stunning.xxx
ReplyDeleteThey are both gorgeous snowflakes and look a lot more complicated than they are. Thank you for the tutorial. I'll try to find the time to make some x
ReplyDeleteFabulous snowflakes, and thank you so much for taking the time to do the tutorial x
ReplyDeletestunning snowflake you are now pinned to my sidebar on the laptop must give this a go lol emma xx
ReplyDeleteGorgeous xxx
ReplyDeleteLovely snowflake :)
ReplyDeleteThis is stunning and i think i am going to have a go and making this one.
ReplyDeleteJoan x
Great tutorial. I love the vellum version you made.
ReplyDeleteFantastic! Elaine-xxx-
ReplyDeleteWow an fabby x thanks for sharing x
ReplyDeleteThis is gorgeous thanks for the great tutorial too! xx
ReplyDeleteThese are just fab Nikki!
ReplyDeleteHugs
Dawn xx
Gorgeous snowflakes Nikki. I've added them to my list of projects to try :) You've said 10 squares for the smaller snowflake but I can only see 9 on yours. Is the extra one used as a mat? xx
ReplyDeleteThe smaller snowflake on the red one has nine, the smaller one on the vellum has 10. You can make them with either 9 or 10 but the smaller the die (the vellum one is made with the smaller dies so that I could get more from one 12x12 sheet) the more you need to make it look fuller.
DeleteLet me know how you get on x
I mat them onto a circle of card if I want to make it easier on myself.
Thanks Nikki. Will give it a go next week when I'll (hopefully) have a bit more time to play. I woke up thinking about them made in black & white this morning! I really do need to get a life ;) xx
Delete