Tuesday 25 February 2014

Roses from scraps

As you will know I love adding the little quilled roses onto my cards and projects.
I have been asked at many demos to do a tutorial and it's been on my to do list for a while.... yesterday one of my cards had them on it and I got lots of messages asking me to tell them how to make them (I do love it when you interact with me about the blog projects. Feel free to let me know if there are any tutorials that you would like me to do)......
So here it is.....
I love to use these punches when creating my flowers. These are xcut.
You can use dies as well. The papers I am using here are the Creativity Club downloads for members (I love these)...
But I am always making these from all my scraps.
Sorry about the blue hint to the photos, the lighting is terrible today, but I really wanted to get the tutorial done for you. I'll retake them another day.
So - get yourself a good pile of circles and scalloped circles.
Once you have made a few, you won't need to draw the spiral. I have just drawn it on to show you where I am going to cut. So cut a spiral into the circle, make it thicker rather than thinner. The thinner you make it the harder it is to work with.
I tend to do quite a few all at once, any spares from your project can go into a box and are then ready for you whenever you want one.
I am using a quilling tool here as I find it much easier but you can just roll them by hand. Start at the thin outside edge and roll towards the centre. Follow the inside line that you cut.

This is what is will look like when it is finished. The body of the rose sits on the centre. This is were you add the glue.
I use a hot glue gun as it's quick and easy and it sets right away.

 A few I made earlier.
Let me know how you get on.... they are nice and easy and great fun to make.
Enjoy...
Happy crafting
Nikki x

Monday 24 February 2014

Do Crafts Monday

If you are on Facebook or Twitter, you might have seen the hashtag #docraftsmonday....
It's where people who like a Do Crafts product, show everyone a pic of what they have made with it....
Pop on over and have a look - or why don't you take part.... just upload a picture onto Do Crafts page and add the hashtag.

My photos for this #docraftsmonday are projects that have been made using the latest downloads from Do Crafts for their Creativity members...... Are you a member of the club? - make sure you check out the downloads section if you are.... fabby range of templates, papers, images and a lot more.

Here are the cards I made using the 1 & 2 Spring Green collections ......

A little clean and simple card to start.....

With this one I have built up the layered flower to add dimension.


I thought I would do something a little different with the layers, here I have used the layers to create a pebble background.

And for my last card I got out the spritz inks for the background and then used the papers to create the roses. The very sparkly centres are created by adding a large drop of silver glitter glue. 


Whatever you are doing today - have fun!
Happy crafting
Nikki x

Monday 17 February 2014

Happy birthday to Kris

My little boy turns 24 today!!!

How on Earth did that happen!!!!
I am so proud of my son - he has grown into a wonderful, kind, considerate young man who is a joy to be around.
This is his birthday card from me.....
 I love the Wellington range - hopefully Do Crafts do more of this at some point...... 
Gonna spend the day with Kris doing whatever he wants... so must dash.....

Hope your day is fun.
Happy crafting
Nikki x

Sunday 16 February 2014

Samuel's naming day has arrived

Today is my nephew Samuel's naming day.
I made two cards for this... the first one will be given to him by my Nanna.....


The second one has been sent down from Kris and I....


I love creating cards for my family and friends....

Hopefully the sun is shining on them all today and that down south gets a break in the stormy weather so they can all enjoy their day.
I'm teaching this morning so will be playing with embossing powders - watch this space to see what the ladies create....
Whatever you are doing today - have fun.
Happy crafting
Nikki x

Friday 14 February 2014

Here comes Bellisima

Here is a sneaky peek of a new range that will be hitting the shops in March.
This is the Bellisima range from Do Crafts....

Here is a card I made with it,


You can see that the colour palette is very similar to the Henbury Lane / Lucy Cromwell collections that came out a while a go.... I loved both of these collections. The pastel mixtures are very feminine....
Watch this space to see some more soon....

Happy crafting
Nikki x

Saturday 8 February 2014

Birthday commission

Some ladies at work saw my Mothers Day card and wanted me to make a 60th card with a similar look.
So this is what I came up with....... the papers are all from the sew lovely range (Do Crafts) and the butterflies have been cut from a 12x12 sheet from the Madam Payrauds collection (Do Crafts).
 Here is what the inside looks like...
 A little close up of the front...
 I love these butterflies.... really effective when you cut them out of the sheet.....

Well, it's a rather wet and windy day here so perfect for staying in my crafty cave and getting some crafty things done...... I've got some cards to make and some more pyrography to do..... I just love the smell of burning wood!
Stay safe and warm wherever you are. I hope you have a fabby weekend.
Happy crafting
Nikki x
I'm entering this into...
Crafting Musketeers

Friday 7 February 2014

More Mothers Day Blues

Here is another card I was commissioned to do.
I love all things hexagon..... it's such a nice shape to be able to use as a background.
You can get them in layered dies from Do Crafts or as a single punch from stampin up. The dies give you lots of option for layering etc and the punch is ideal if you want to just use one size as a background.
I just had to have both!!!! lol


The papers are the Parisienne Blue capsule collection from Do Crafts, the lettering is from the Madam Payraud collection - I love letter stickers and these are really cute!!! They are like the old style typewritter keys.
More pyrography and a few more cards to make today..... I'll show you as soon as I can.
Have a great day everyone....
Happy crafting
Nikki x

Thursday 6 February 2014

Another busy week....

I've been working away on commissions this week. Nice to be busy and nice to be creating with something totally different... pyrography...... I'll be able to show you some of these very soon.
I have also been asked to create some cards for some ladies at work...
Here is the first one I created,


I was really pleased with the way this one turned out.
What crafty things have you been up to?
Nikki x
I'll be back soon with another one to show you...

Saturday 1 February 2014

Times flies...

when you are having fun!
Lots of things have been going on here..... crafty stuff galore this week.... some of it I can't show you at the moment, but the minute I can - I will!
I've had fun with it... over the weekend it will be time for the write ups... not my fav part but they do need to be done! lol

If you have joined me as part of the Facebook group - Crafting Cafe blog hop.... welcome.... if you are not a member of this group but you 'do' Facebook and would like to join us, you will find a link over on my side bar..... just send a request and we will add you x

If you have joined me from Do Crafts for their weekend blog hop - well 'Howdy' to you all too!

If you are here just to visit.... please feel free to have a look around - great to have you here....
Over on the Crafting Cafe blog there is a new challenge, this month sponsored by WOW! embossing powders.... The prize is 6 pots of embossing powder! Love these powders....
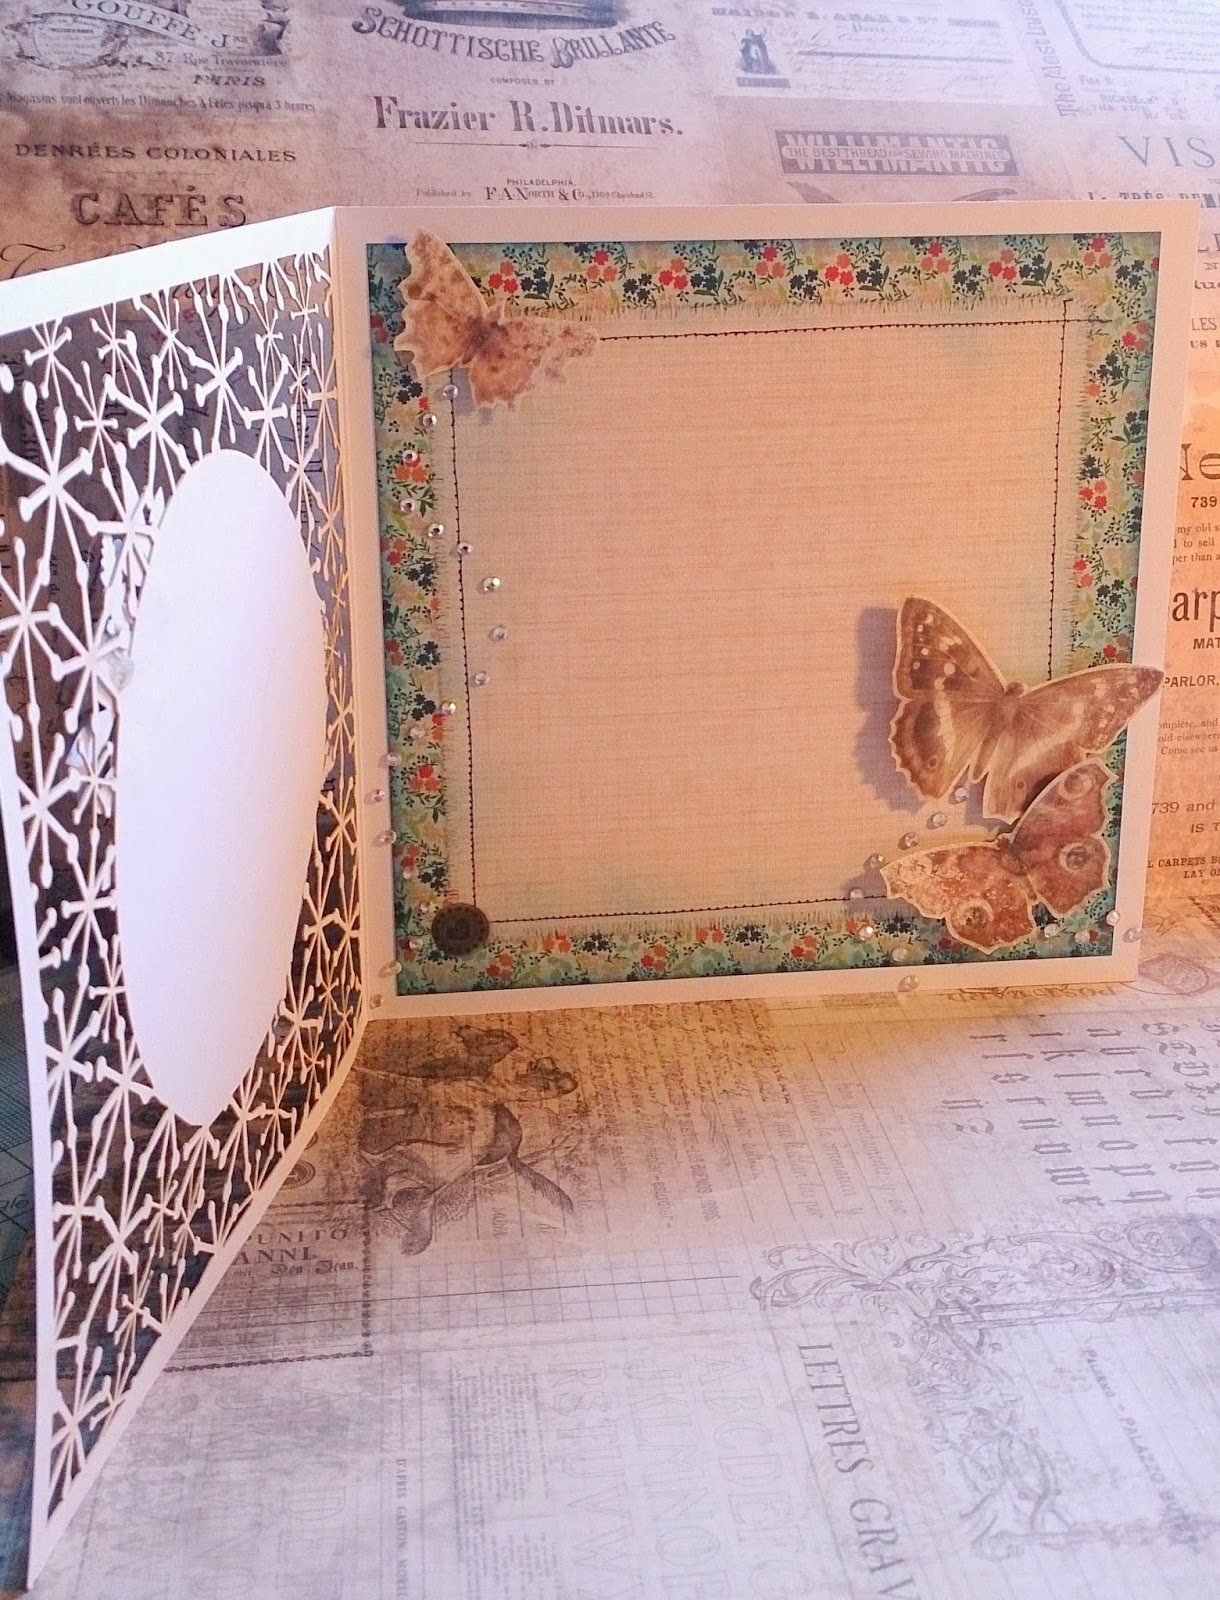
Here are some of the things I made for the launch post...
 With my first card I embossed the background design with clear embossing powder and then covered with ink. When you wipe the ink away it only stays on the cardstock, and on the embossed area just wipes off. It's an easy technique that gives amazing results.
 For these hearts I used one of WOW!'s silicone moulds. You just melt the powder - I use my melting pot, then pour the liquid into the moulds. It sets very quickly and the results are amazing. Great for using as embellishments on your crafty projects, but these can also be made in jewellery!!!!
With my final card for today - the material on the background has been triple embossed with clear embossing powder, in fact I think is was done several times as I was just having way to much fun!!! It made the material really stiff. Great for then cutting or die cutting.... But I just wanted it on the card as it was.

SO this weekend I have lots of writing to do and a couple of desks to clear..... but I think I might just have to go and do some colouring in..... or maybe some other crafting............
Hey, the boring bits and housework will still be there tomorrow....

Whatever you are up to this weekend, have a great weekend!
Happy crafting,
Nikki x