We often struggle to create cards and projects for the boys and men in our lives and to be honest I think that's because we make it to complicated........ (Me included!)
So I set myself the challenge for some clean and simple cards....
Here is what I came up with...
All of these cards can be made in under 10 mins each so nice and easy for that card that we might forget!
It's great to batch make some of these cards so they are good to go.
I'm off to sort out some more of my studio, it's nice to finally be able to see my desk.
Happy crafting
Nikki x
Wednesday, 15 March 2017
Friday, 10 March 2017
A little tutorial for you, paperfolding flower
To make these flowers you will need 6 squares for each flower. All your squares should be the same size.
Create 1 petal at a time. Lay the square so it looks like a diamond.
Fold the square in half, point to point.
Take each side corner and fold up to the centre point.
Your square will look like this when it's finished.
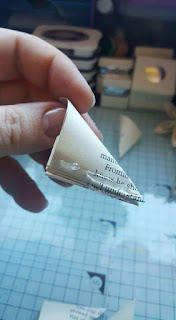
Slide your finger into the little pocket that you have just created. Flatten this section, it will look like a kite on each side.
Fold over the points.
And then fold the sides over.
I use a hot glue gun for the gluing as it sets instantly but you can use any adhesive. Glue your 2 outside edges together.
Follow these instructions to make 6 petals then start to glue them together.
Only add glue to the inner section as above.
This is what the finished flower looks like.
I created a selection of different sizes.
If you glue 12 together you'll get a beautiful flower ball.
I'll show you my finished project very soon.
If you make any let me know. I'd love to see them.
Happy crafting
Nikki x
Labels:
book folding,
paper folding,
Tutorial
Subscribe to:
Comments (Atom)


